How to Record Audio on Your Phone with Quality: The Complete Guide 2026
By Bruno Dissenha — Developer and creator of Audio-Editor Online. Bruno built this platform after struggling to find a free, private audio editor that actually worked without catches. He writes about audio editing to help the same people the tool was made for.
Published on: March 25, 2026 · Updated on: March 25, 2026
Recording audio on a phone has become routine for podcasters, content creators, teachers, and musicians. The problem is that most recordings come out full of background noise, inconsistent volume, or below-expected quality — not because of the device's limitations, but due to lack of proper configuration.
In this complete guide, you'll learn how to record audio on your phone with real quality: which settings to enable, which apps to use, how to avoid the most common mistakes, and finally, how to edit the result directly in your browser without installing anything.
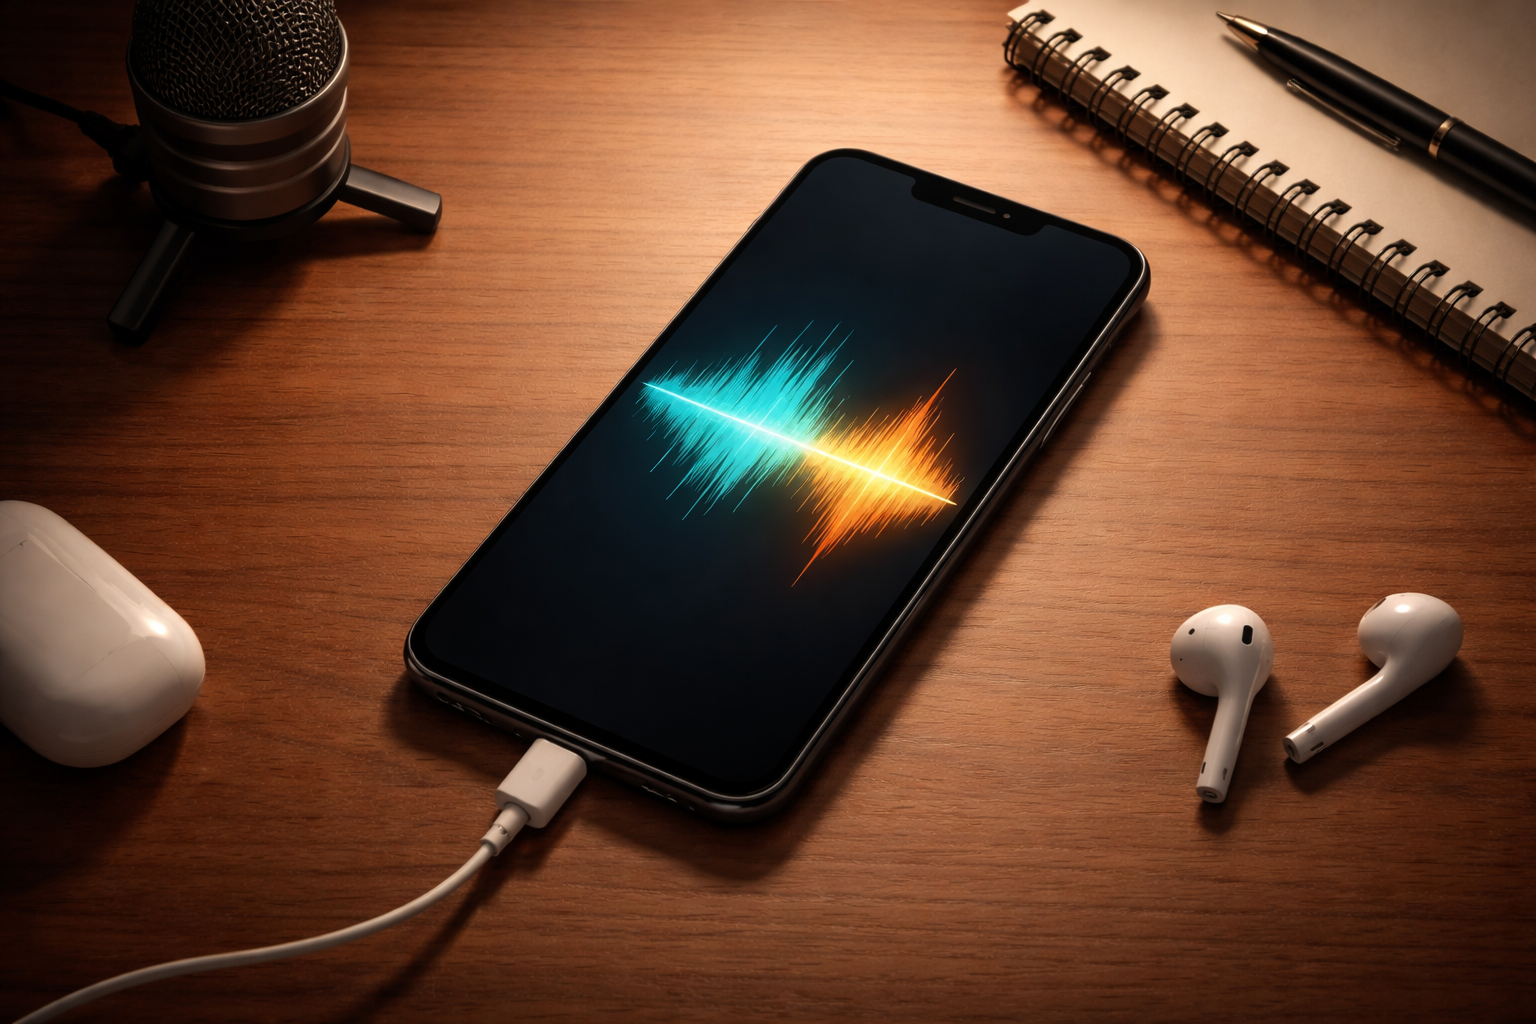
Table of Contents
- Can a phone record audio with professional quality?
- Essential settings before recording
- Best apps for recording audio on a phone
- How to prepare the recording environment
- Recording technique: how to hold and position your phone
- Most common mistakes and how to avoid them
- What to do with the audio after recording
- How to edit phone-recorded audio without installing anything
- Practical use cases
- Frequently Asked Questions (FAQ)
- Conclusion
Can a phone record audio with professional quality?
The short answer is: yes — with caveats.
Built-in microphones in modern smartphones have evolved significantly. Mid-range and premium devices from 2022 onward can capture voice with enough clarity for podcasts, online lessons, video narration, and even simple musical demos. The problem isn't the hardware — it's how most people record.
Recording with the native voice memo app, in an echoey room, with the phone far from your mouth and notifications enabled results in poor audio. But that same phone, with the right app, in the right environment, and with the correct technique, produces surprisingly good results.
The big advantage is convenience: your phone is always with you, requires no complex setup, and lets you record anywhere with an agility that dedicated equipment can't match.
Essential settings before recording
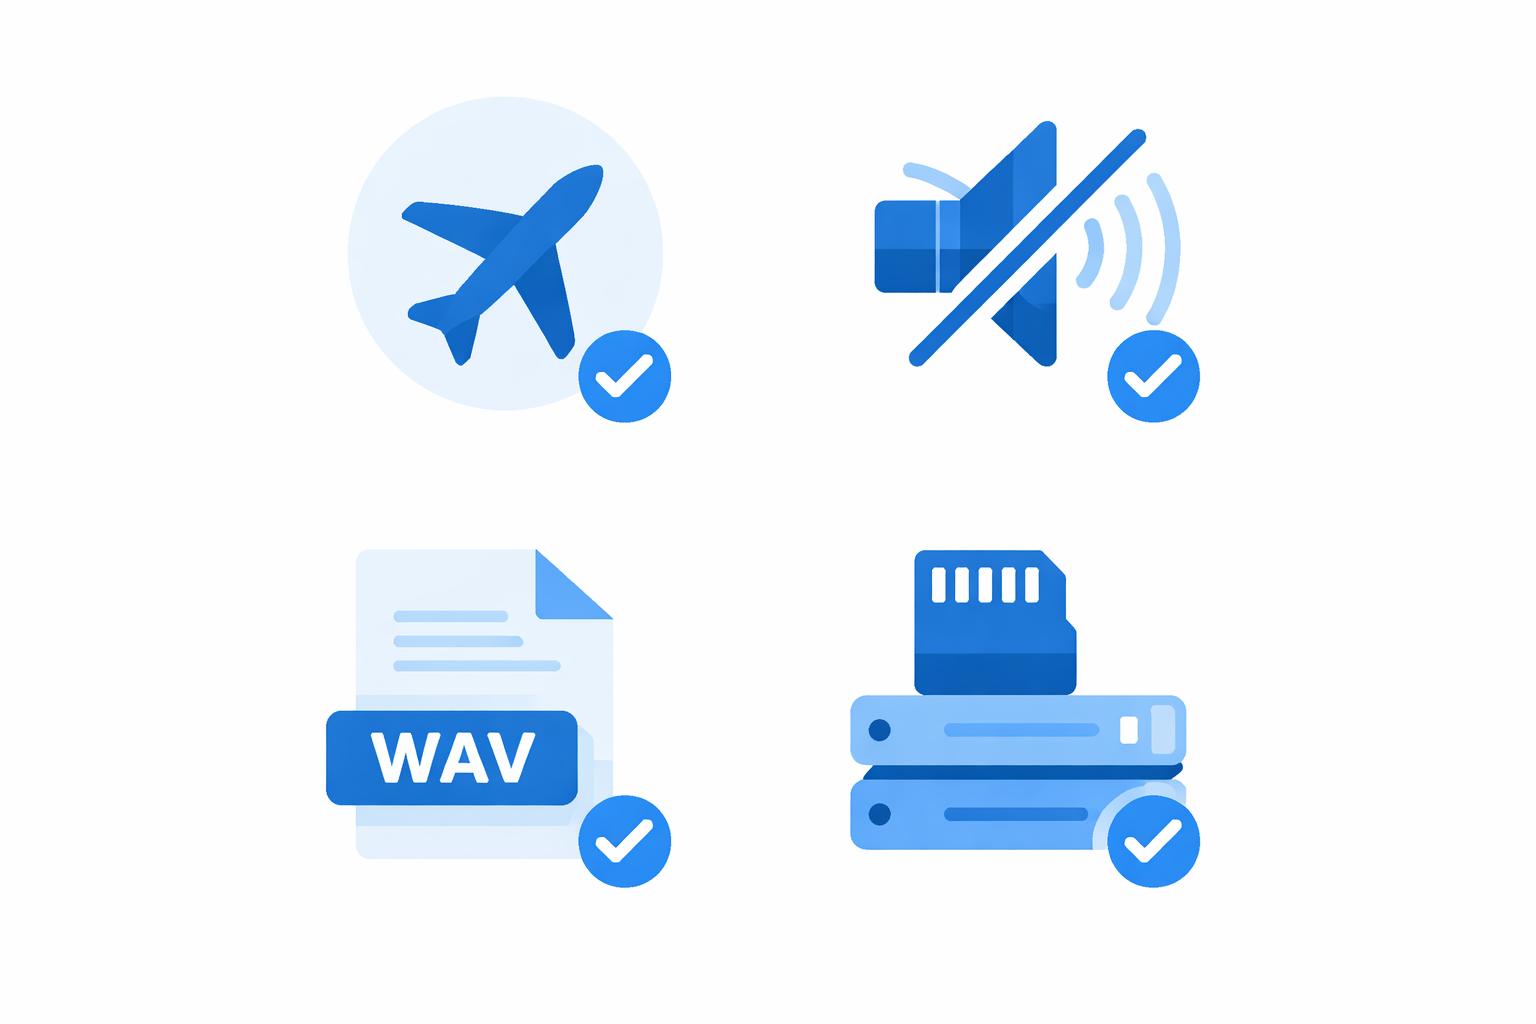
Before opening any recording app, adjust these settings on your phone:
Enable airplane mode (or full silent mode)
Calls, notifications, and message alerts interrupt recordings and create point noises that are impossible to remove afterward. Enable airplane mode or, if you need internet during recording, leave only Wi-Fi active and disable mobile data.
Disable automatic sound stabilization
Many phones have automatic audio processing active by default — wind filters, automatic noise suppression, dynamic gain adjustment. For quality recordings, disable all of these. They were designed for phone calls, not content recording. The ideal approach is to record raw audio and apply adjustments afterward, with full control.
- On Android: Settings → Sound → Sound quality and effects → disable everything.
- On iPhone: Settings → Camera → Record Stereo Sound → enable; in third-party apps, look for "Audio Processing" and disable it.
Configure the recording format
Whenever possible, record in WAV or FLAC instead of MP3. Lossless formats preserve 100% of the original quality and make post-editing easier. If the app doesn't offer these options, use the highest available MP3 bitrate (256 or 320 kbps).
Clear storage space
High-quality recordings take up significant space. A one-hour WAV file occupies about 600 MB. Make sure you have enough space before starting to avoid unexpected interruptions.
Best apps for recording audio on a phone
The native voice recording app works for quick notes but doesn't offer enough control for quality recordings. Here are the best options by platform:
For Android
RecForge II
One of the most complete for Android. Lets you record in WAV, FLAC, MP3, and OGG, manually control gain, view input levels in real time, and configure bitrate.
AudioShare
Focused on recording and organizing audio files. Supports high-quality formats and easy integration with other production apps.
ASR Voice Recorder
Simple and efficient. Records in high quality, has time markers to flag important moments during recording, and exports directly to cloud storage.
For iPhone (iOS)
Voice Memos (native)
Underestimated by many. On iPhone, the native app records in M4A format at true 44.1 kHz quality. Works well for voice and is always the easiest starting point.
Ferrite Recording Studio
The most complete for iOS. Gain control, multi-channel support, built-in basic editing, and export in various formats. Widely used by iPhone-based podcasters.
Hindenburg Field Recorder
Designed for journalists and podcasters. Automatic high-quality recording with intelligent level adjustment, markers, and project organization.
For both platforms
Rode Reporter
Developed by microphone manufacturer Rode. Precise gain control and high-resolution WAV recording, works perfectly with Rode microphones connected to the phone.
How to prepare the recording environment
The environment where you record has more impact on final quality than the phone model or app chosen.
Choose a low-echo environment
Rooms with many hard, parallel surfaces (smooth walls, low ceilings, tile floors) create reverb. To reduce echo without formal acoustic treatment, prefer:
- Rooms with carpet or thick rugs
- Spaces with heavy curtains — they absorb sound reflections
- Walk-in closets full of clothes — textile materials absorb sound surprisingly effectively
- Libraries or bookshelves full of books — the irregular surfaces scatter reflections
Eliminate constant noise sources
- Turn off air conditioning, fans, and heaters
- Close windows facing busy streets
- Let people in the same space know you're recording
- Turn off nearby refrigerators or freezers if possible (the compressor cycle creates a constant hum)
Record at the right time
The sound environment changes throughout the day. Early morning or nighttime tends to be quieter — less traffic, less surrounding activity. If you live in an urban area, try recording at different times to find the quietest window.

Recording technique: how to hold and position your phone
The position of the phone relative to your mouth is one of the most overlooked — and most impactful — factors in recording quality.
Ideal distance
For voice (podcasting, narration, lessons): keep the phone 15 to 25 cm from your mouth. Too close causes distortion and captures the air from plosive consonants ("p," "b," "t"). Too far picks up more room sound and reduces your voice volume relative to background noise.
Angular position
Position the microphone slightly below or to the side of your mouth, never directly in front. This drastically reduces the impact of plosives.
Where is the microphone on a phone?
On most smartphones, the main microphone is at the bottom of the device (next to the USB/Lightning port). For voice recording, point the bottom of the phone toward your mouth.
Avoid holding the phone in your hand
Handling noise (fingers sliding on the screen, position changes) is picked up directly by the microphone and is very difficult to remove afterward. If possible:
- Use a mini phone tripod (costs less than $10)
- Rest the phone on a stable surface
- Use a desk mount with an adjustable arm
Most common mistakes and how to avoid them
Recording with too-high or too-low volume
Check the app's level meter during recording. The ideal signal sits between -12 dB and -6 dB. Record a 30-second test and listen before starting the real recording.
Not doing a test recording
Always record 1 minute of test before the real recording. Listen with headphones — not through the phone's speaker, which masks quality issues.
Forgetting to disable notifications
A single notification "ping" in the middle of a recording can ruin a segment that can't be re-recorded. Airplane mode is mandatory.
Recording in low-quality MP3
Some apps record in low-bitrate MP3 by default to save space. The result starts compromised and degrades further after editing. Always configure for WAV or the highest available bitrate.
Speaking too far or too close to the microphone
Too far: weak voice, too much room sound. Too close: plosive distortion and signal saturation. The ideal distance is 15 to 25 cm for spoken voice.

What to do with the audio after recording
Even with all precautions, phone recordings almost always need at least one basic adjustment before they're ready. The most common are:
- Trim the beginning and end: Remove silence or noise before and after the main content.
- Reduce background noise: Even in good environments, there's always some captured noise. Online noise reduction resolves this in seconds.
- Normalize the volume: Ensures the audio reaches the listener at the right level.
- Equalize the voice: A gentle cut below 80 Hz and a slight boost at 2–4 kHz makes the voice clearer and more present.
- Add fade in and fade out: Smooth transitions at the beginning and end eliminate abrupt cuts that sound amateur.
All of this can be done for free, directly in the browser, without installing anything.
How to edit phone-recorded audio without installing anything
After recording, transfer the file to your computer or access it directly from your phone — Audio-Editor Online works on any device with a modern browser.
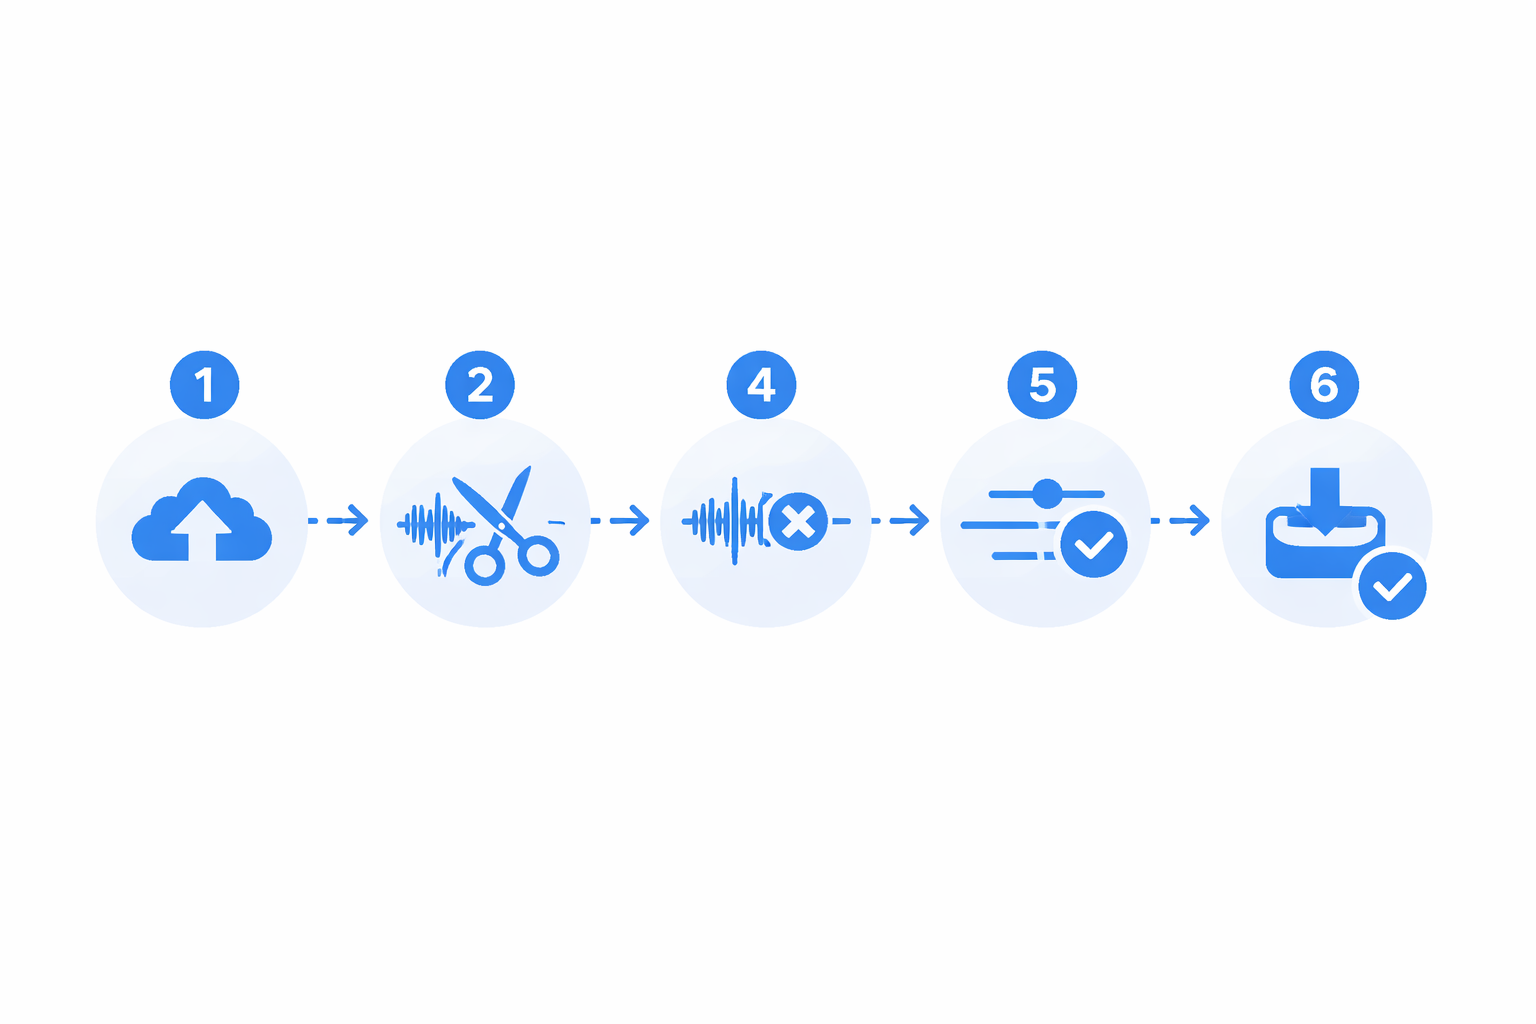
The recommended flow for phone-recorded audio:
1. Upload the file
Go to the online audio editor and load the recorded file. Supports MP3, WAV, FLAC, M4A, OGG, and AAC. No file is sent to external servers — all processing happens on your device.
2. Trim the beginning and end
Use the cutting tool to remove silence or noise before and after the main content.
3. Apply noise reduction
Access the noise reduction tool. Start with 30% to 50% intensity and listen before increasing.
4. Normalize the volume
Use the volume adjustment tool and apply normalization to -14 LUFS (YouTube, Spotify) or -16 LUFS (Apple Podcasts).
5. Equalize if needed
Apply the "Voice/Podcast" preset in the equalizer to improve voice clarity.
6. Add fade in and fade out
Use the fade tool to add smooth transitions of 1 to 2 seconds at the beginning and end.
7. Export in the right format
- Podcast: MP3 192 kbps
- YouTube: MP3 320 kbps or WAV
- Archiving: WAV or FLAC
- WhatsApp / social media: MP3 128 kbps
Practical use cases
Podcasters without a studio
A phone is the most accessible solution for those who want to start a podcast without investing in equipment. With an app like Ferrite (iOS) or RecForge II (Android), a minimally treated environment, and post-editing in Audio-Editor Online, you can produce episodes with enough quality for the major podcast platforms.
Teachers and online course creators
Recording phone-narrated lessons is practical and fast. Volume normalization in the editor resolves inconsistencies between sessions; a closet or carpeted room handles the echo problem.
Journalists and interviewers
A phone is the most discreet and versatile field recorder available. For interviews, place the phone on a table between participants, about 30 cm from each person.
Musicians for quick demos
For quickly capturing a musical idea, a phone works great. The ideal is to record in WAV and use the editor to normalize the volume before sharing with collaborators.
Social media content creators
For voiceovers in TikTok videos, Instagram Reels, or YouTube Shorts, a phone is more than sufficient with a quiet environment and post-editing.
Frequently Asked Questions (FAQ)
Which phone is best for recording audio?
For voice recording, any mid-range or premium smartphone from the last 3 years offers sufficient quality. iPhone 12 and later, Samsung Galaxy A54 and later, and similar models record well. The environment and technique have more impact than the phone model.
Is it better to record on a phone or buy a dedicated recorder?
For getting started, a phone is enough. Dedicated recorders like the Zoom H1n or Tascam DR-05X offer advantages in noisy environments and for long recordings, but the quality difference for voice in a controlled environment is small.
How do I record two people with one phone?
Place the phone on a surface between the two people, centered between them. Recommended distance: 20 to 30 cm from each person. Speak one at a time to make post-editing easier.
Can phone-recorded audio be used professionally?
Yes. Podcasts on Spotify and Apple Podcasts, YouTube videos, and online courses are regularly produced with phone-recorded audio. What defines the result is the technique, the environment, and post-editing — not the equipment.
Do I need an external microphone to record on a phone?
It's not mandatory. For voice in a controlled environment, the built-in microphone is sufficient. External microphones like the Rode VideoMicro or Shure MV88 improve quality and are worth the investment once you master the basic technique.
How do I transfer audio from my phone to a computer?
The most practical ways are: USB cable, Google Drive or iCloud, AirDrop (iPhone to Mac), or email for smaller files. For large WAV files, USB cable or cloud storage are the most reliable.
Conclusion
Recording quality audio on a phone doesn't require expensive equipment or advanced technical knowledge. It requires attention to details most people overlook: the environment, the settings, the microphone position, and the right app.
With the guidance in this guide, you have everything you need to produce recordings that sound professional — whether for podcasts, lessons, interviews, musical demos, or social media content.
And when the recording is done, the next step is editing. Audio-Editor Online has all the tools you'll need — trimming, noise reduction, normalization, equalization, and more — right in the browser, without installing anything, creating an account, or paying.