Quick answer
Plosives are easy to miss on laptop speakers and impossible to miss on headphones or a car stereo, where each P lands like a tap on the microphone. This guide shows how to find them, why they happen, how the de-plosive decides what to filter, how to use it in the browser, and what it measured on a test file.
How to recognize plosives
Listen to words that start with P and B ("people", "problem", "big") on headphones. A plosive is a soft "thup" or a low thud at the very start of the word, often louder than the word itself in the bass. T, D, K and G can do it too, more mildly.
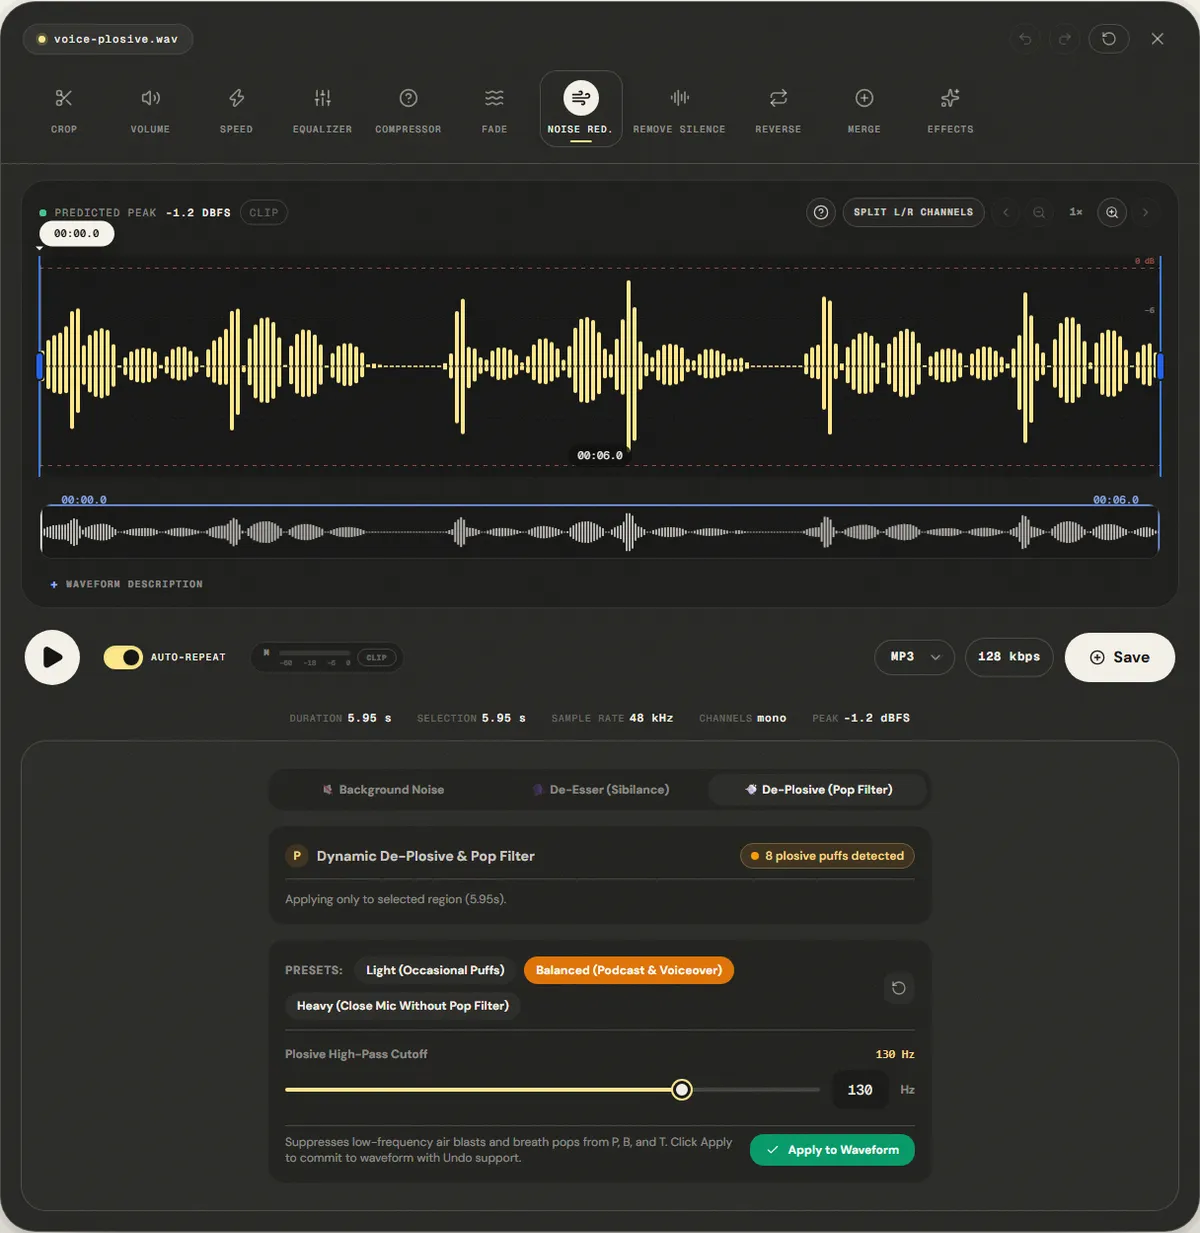
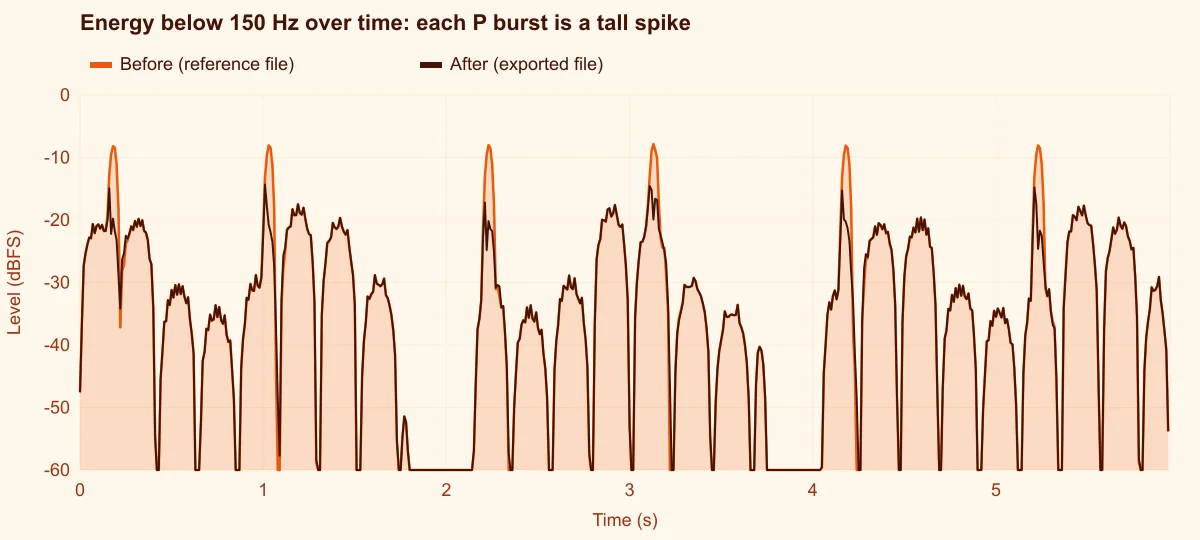
On the waveform, a plosive is a tall, slow bulge at the start of a word, taller than the vowels around it and much wider than a click. Looking only at the energy below 150 Hz over time, each pop is a spike that stands 10 dB or more above the voice's own low end, as Figure 2 shows.
A one-minute check for pops
Pops hide under the voice on small speakers. To hear only them, temporarily listen to the low end alone: in the equalizer, pull the mid and treble bands down as far as they go and play the file without applying anything. What remains is the bass of the voice, a soft murmur, and every pop as a distinct thump. Note the times, then reset the equalizer before you continue. If you count more than one pop every few sentences, process the whole file; if there are only two or three, select those words instead.
Why plosives happen
To say P or B, the lips close, pressure builds up behind them, and the air is released in a burst. Close to the mouth that burst is a moving column of air, not sound, and when it hits the microphone diaphragm it pushes it like a finger would. The result is a large, slow movement that the microphone records as a low-frequency thump, mostly between 20 and 150 Hz.
Three things make it worse:
- Distance. The air blast spreads and slows quickly. At 5 cm it hits hard; at 20 cm much less.
- Pointing straight at the mouth. The burst travels forward. A microphone slightly to the side catches the voice but not the wind.
- Directional microphones close up. Cardioid microphones boost low frequencies when very close to the source (the proximity effect), which makes the thump even louder.
A permanent high-pass filter at 150 Hz would remove the pops, but it would also remove the chest and warmth of the voice in every word. A de-plosive applies the filter only during the bursts.
How the de-plosive decides what to filter
The tool follows two bands of the voice at the same time: a low band around 70 Hz, where pops live, and a middle band around 1.2 kHz, where speech lives. A plosive is the moment when the low band crosses the detection threshold and is clearly stronger than the middle band. A normal vowel has energy in both bands, so it does not trigger. The envelope reacts in 3 ms and lets go in 60 ms, about the length of a pop.
While a pop is detected, the tool crossfades from the original voice to a high-passed copy of it. The cutoff is set by the preset or the slider (40 to 160 Hz), and the crossfade goes further when the pop is stronger and when the preset intensity is higher (30%, 60% or 90%). Between pops the original passes untouched.
How to remove plosives, step by step
The Remove Plosives page opens your file in the editor on the noise tools with the De-Plosive (Pop Filter) tab selected. It runs in your browser.
Step 1: Open the file and check the count
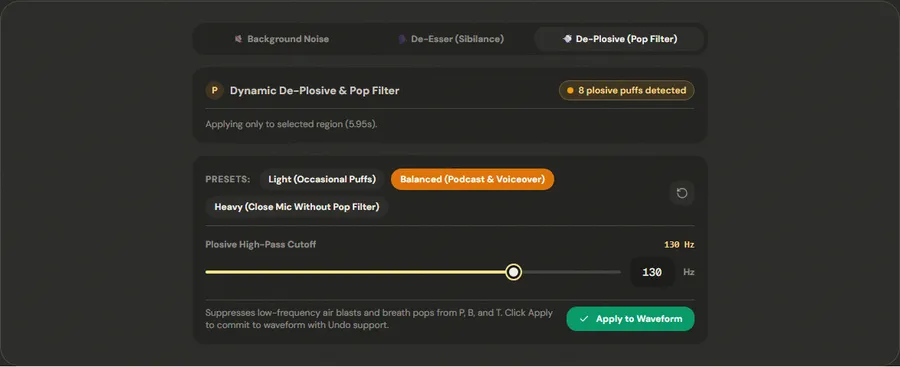
The card Dynamic De-Plosive & Pop Filter shows how many pops the analysis found. On our file it read "8 plosive puffs detected" for six inserted pops, so treat the number as a guide rather than an exact count. The line below shows the range that will be processed.
Step 2: Pick a preset
- Light (Occasional Puffs): 30% intensity, 100 Hz cutoff, detection at −20 dBFS. For a few soft thumps you only notice on headphones.
- Balanced (Podcast & Voiceover): 60%, 130 Hz, −24 dBFS. The default, and what we measured.
- Heavy (Close Mic Without Pop Filter): 90%, 160 Hz, −28 dBFS. For a speaker right on the microphone with nothing in between.
Plosive High-Pass Cutoff moves the filter between 40 and 160 Hz. Lower it for deep voices that sound thin after processing; raise it if a pop still thumps.
Step 3: Apply and listen to the B and P words
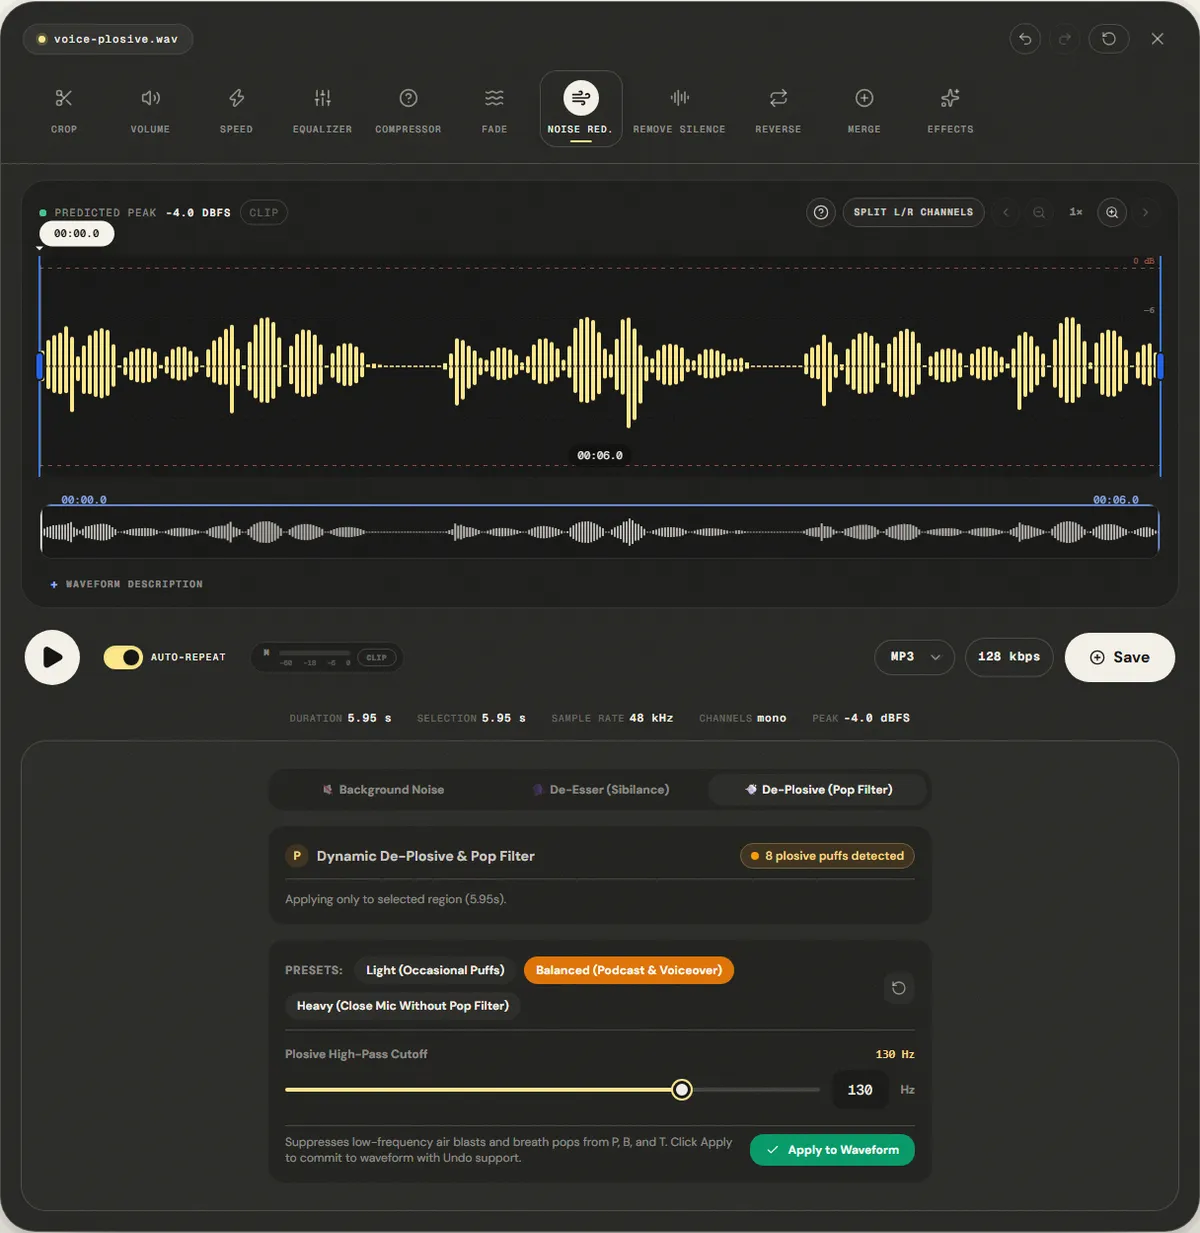
Click Apply to Waveform, then play a few words starting with P and B and a few without. The pops should be gone or soft, and the other words should sound the same as before. The change can be undone.
Step 4: Clean up what remains
If a single pop is still loud, select just that word and apply Heavy to the selection. If the pop also overloaded the microphone, you will hear a crackle on top of the thump: run the clipping repair on that word too. Then compress, normalize and export.
Measured example
We added six 70 ms low thumps at 55 Hz to the reference voice, the shape of a P hitting the capsule. The page opened the editor on the De-Plosive tab; we clicked Apply to Waveform with the default Balanced preset (60%, 130 Hz).
Energy in the 30–120 Hz thump band fell 8.0 dB, close to the 8 dB a 60% reduction implies.
| Measured | Before | After |
|---|---|---|
| Thump band 30–120 Hz | 41.0 dB | 33.0 dB |
| Speech band 300 Hz–3.4 kHz | 36.1 dB | 35.0 dB |
Reference file (before)
Exported file (after)
The speech band also changed −1.1 dB: the filter only acts while a burst is detected, but the voice under that burst is lowered too. Use Light on clean recordings.
Download the reference file (WAV) · Same test on the tool page · Measured on November 11, 2026
The 1.1 dB drop in the speech band is the honest cost: while a pop is being filtered, the voice under it goes through the high-pass filter too. Because the filter acts only for the length of each burst, this is hard to hear on most voices, but on very deep voices the first syllable after a P can sound slightly thinner. That is when Light, or a lower cutoff, is the better trade.
Troubleshooting
| What you hear or see | Likely cause | What to change |
|---|---|---|
| Pops are softer but still audible | Intensity or cutoff too low for how hard the air hit | Use Heavy, or raise the cutoff to 150–160 Hz |
| Words after a P sound thin | Cutoff too high for a deep voice | Use Light, or lower the cutoff to 80–100 Hz |
| A crackle remains on top of the pop | The pop also overloaded the microphone or preamp (clipping) | Run the clipping repair on that word |
| Constant low rumble, not only on P and B | Traffic, air conditioning or handling noise | A fixed low cut with the equalizer, or background noise reduction |
| Short ticks on lip contact remain | Mouth clicks, not plosives | Use the click remover |
Limits and alternatives
The de-plosive removes the low-frequency part of the pop. If the burst was strong enough to overload the microphone or the preamp, the recording also has clipping and distortion that a filter cannot undo. It also cannot separate a pop from a deep note that starts at the same instant, such as a kick drum under the voice, so on mixed music it may thin those notes.
Prevention is cheap and works better:
- Use a pop filter (mesh or metal screen) 5 to 10 cm in front of the microphone.
- Speak past the microphone, aiming slightly to its side or over its top.
- Keep a distance of about a hand's width for spoken word; closer adds bass and pops.
- If your interface or recording software has a low-cut switch at 80 Hz, use it for speech; it removes rumble without touching the voice.
Frequently asked questions
What is the difference between a plosive and a click?
Does the de-plosive affect my whole recording?
Which cutoff should I use?
Can I fix plosives on a phone recording?
Should I use a high-pass filter instead?
Sources and how this was tested
- Robert Bristow-Johnson, Audio EQ Cookbook (W3C Note): high-pass and band-pass filters
- Audacity Manual: High-Pass Filter
Tested on November 11, 2026 in Chromium 153 on Windows 11, with a production build of this site. Screenshots and measurements were made by the scripts in scripts/tool-evidence, from synthetic reference files anyone can download and repeat.